How to Paint Your Home in Compliance with HOA Guidelines

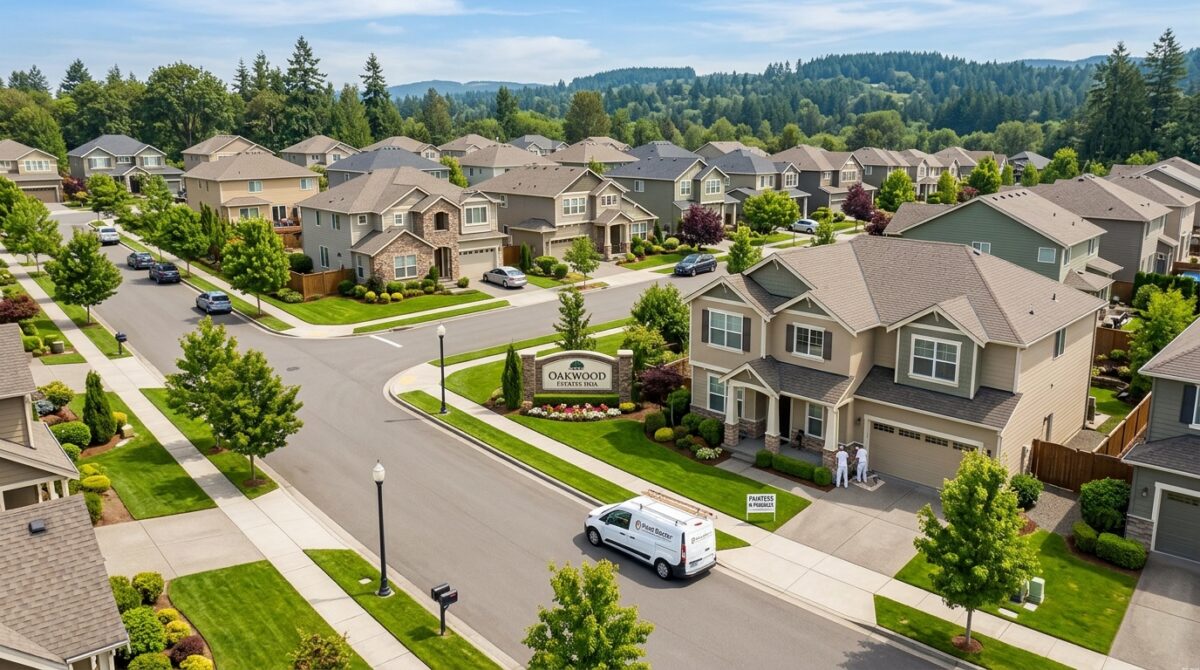
Living in a Homeowners Association (HOA) community brings wonderful perks: well-maintained neighborhoods, great curb appeal, and protected property values. However, when it comes time to refresh your home’s exterior, navigating HOA regulations can feel like walking a tightrope.

A single unapproved paint shade or missed deadline can lead to fines, delayed projects, or even being forced to repaint the entire house at your own expense. At Paint Doctor’s Painting Service, we’ve helped hundreds of homeowners refresh their properties while staying 100% compliant with local HOA architectural standards.

Here is your step-by-step guide to painting your home without the HOA headaches.

1. Review Your Community’s CC&Rs First

Before picking up a color swatch or scheduling an estimate, request the latest copy of your HOA’s Covenants, Conditions, and Restrictions (CC&Rs) or Architectural Review Committee (ARC) guidelines.

Most HOAs regulate:

  • Approved Color Palettes: Specific combinations for body, trim, shutters, and front doors.
  • Paint Finish & Sheen: Approved levels for siding (usually flat or low-lustre) versus trim and doors (satin or semi-gloss).
  • Adjacent Home Rules: Many communities prohibit choosing the same main color scheme as the homes directly adjacent or directly across from yours.

2. Submit Your ARC Request Early

Most HOAs require an Architectural Review Board (ARB) or Architectural Review Committee (ARC) approval form before any work begins.

  • Submit at least 30 to 45 days before your ideal start date. Approval boards usually meet once a month.
  • Include exact paint brand names, line codes, and finish types. Simply writing “beige body, white trim” will almost certainly cause your application to be rejected or delayed.
  • Attach physical paint swatches or renderings if required by your committee.

3. Don’t Skip the “Same Color” Assumption

A common trap homeowners fall into is assuming that painting their home the exact same color doesn’t require HOA approval.

Even if you are refreshing the existing scheme:

  • Original paint formulas fade over time under sunlight and weather exposure.
  • HOA boards update approved color palettes every few years. Your original 10-year-old color scheme may no longer be on the approved list.

Rule of thumb: Always verify with your HOA board—even for exact color matches—before starting work.

4. Hire a Contractor Experienced in HOA Compliance

Working with a professional painting team like Paint Doctor’s Painting Service takes the burden off your shoulders. Here’s how an experienced contractor protects you:

  • Detailed Estimates for ARC Applications: We provide precise paint manufacturer details, sheen specifications, and surface preparation plans to submit alongside your HOA paperwork.
  • Licensed & Insured Execution: Most HOAs strictly mandate that contractors working on the property carry General Liability and Workers’ Compensation insurance. We provide proof of insurance directly to your HOA manager if required.
  • Workplace Standards & Timelines: HOAs strictly regulate work hours, noise levels, equipment storage, and debris cleanup. We ensure your property stays clean and work stays within permitted neighborhood hours.

The Paint Doctor Process for HOA Projects

StepAction ItemWho Handles It
1. Free ConsultationInspection of home exterior & color consultationPaint Doctor & Homeowner
2. HOA SubmissionGathering swatches, codes, and contractor detailsHomeowner (with Paint Doctor assistance)
3. Approval CheckVerifying formal written ARC approvalHomeowner & Paint Doctor
4. Surface Prep & PaintPower washing, scraping, priming, and precision paintingPaint Doctor Team
5. Final InspectionFinal walk-through to ensure complete HOA compliancePaint Doctor & Homeowner

Traditional Craftsman House Exterior Colors: Classic Palettes & Design Tips

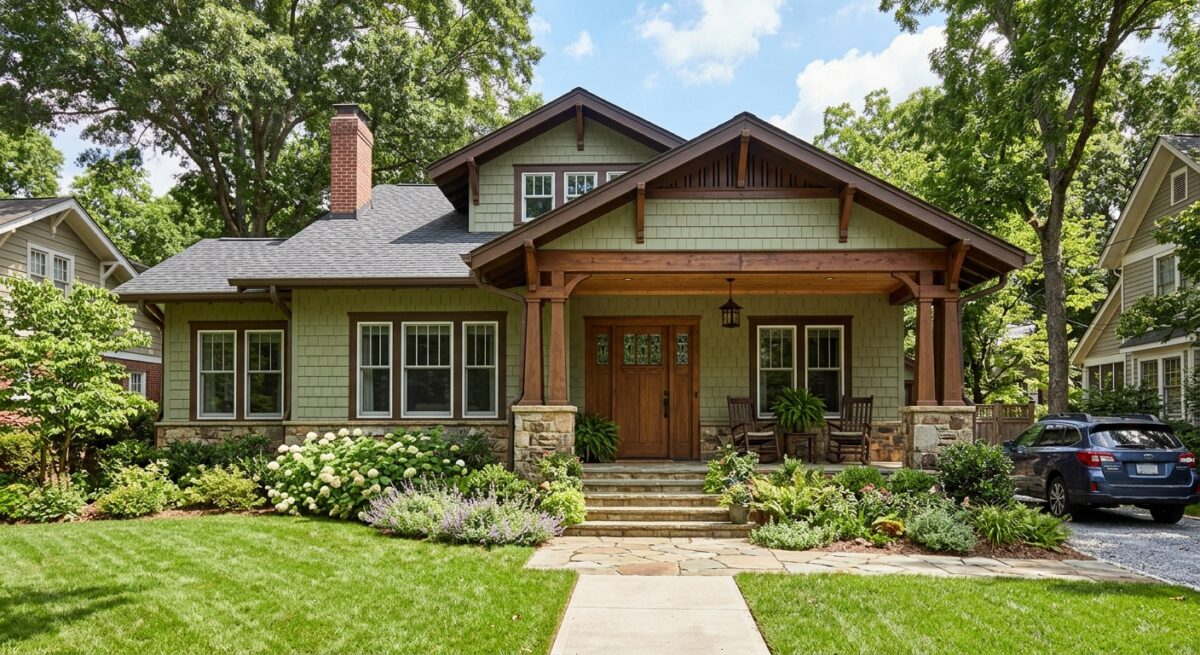
Few architectural styles command the cozy, grounded charm of an American Craftsman home. Defined by low-pitched gable roofs, tapered porch columns, handcrafted knee braces, and exposed rafter tails, Craftsman architecture celebrates structural artistry and natural materials.

However, when it comes time to paint a Craftsman exterior, many homeowners feel overwhelmed. With so many architectural elements—shingles, lap siding, structural beams, window casings, brackets, and stone piers—how do you pull together a cohesive palette that honors history while maximizing curb appeal?

Born out of the early 20th-century Arts and Crafts movement, traditional Craftsman homes rely on exterior colors that harmonize directly with the surrounding landscape. In this guide, we break down the core principles of Craftsman color theory, present five authentic paint palettes, and share practical design tips to make your home’s handcrafted details shine.


1. The Core Principles of Craftsman Exterior Design

Before selecting paint chips, it helps to understand how colors function on a traditional Craftsman facade. Unlike minimalist modern homes or stark monochrome farmhouses, a Craftsman home depends on a carefully layered hierarchy of shades.

The Rule of Three (Body, Trim, Accent)

A successful Craftsman scheme almost always relies on three distinct color roles:

  • Body (60–70% of the exterior): This is the main color applied to your lap siding, shingle cladding, or stucco. It serves as the visual anchor and should generally be an organic, muted shade found in nature.
  • Trim (25–30% of the exterior): Applied to window casings, porch pillars, fascia boards, and door frames. Trim provides definition and outlines the home’s silhouette.
  • Accent (5–10% of the exterior): Reserved for focal points like the front door, window sashes, decorative gable brackets, or exposed rafter tails. This is where you can introduce bolder contrast.

Integrating Natural Materials

Paint should never fight against your home’s permanent hardscaping. Original Craftsman homes rely heavily on unpainted materials like river rock foundations, fieldstone chimneys, red brick pedestals, and stained wood shakes. Always select paint undertones that match the warmth or coolness of your existing masonry and wood tones.


2. 5 Authentic Craftsman Color Palettes

Palette 1: Earth & Forest Green

This is perhaps the quintessential American Arts and Crafts combination. Deep, muted greens allow the home to feel as though it grew naturally out of its surrounding landscape.

  • Body: Deep Sage or Olive Green
  • Trim: Warm Cream or Soft Off-White
  • Accent & Door: Crimson, Rust Red, or Natural Stained Dark Wood
  • Best For: Properties surrounded by mature trees, lush gardens, or wooded lots.

Palette 2: Warm Earthy Brown & Taupe

Grounding and inviting, a brown-based palette emphasizes warmth and substantial architectural weight. It bridges the gap between raw timber and finished paint.

  • Body: Chestnut Brown, Bark, or Warm Taupe
  • Trim: Soft Beige or Warm Vanilla
  • Accent & Door: Deep Forest Green or Rich Burgundy
  • Best For: Homes featuring prominent river rock, fieldstone pedestals, or exposed brickwork.

Palette 3: Pacific Northwest Slate & Cedar

For a slightly cooler, maritime-inspired look that remains thoroughly historic, slate blues and charcoal grays offer striking contrast when paired with warm wood accents.

  • Body: Slate Blue or Dusty Charcoal Gray
  • Trim: Classic Antique White
  • Accent & Door: Natural Cedar Stain, Warm Terracotta, or Mustard Yellow
  • Best For: Coastal environments, mountain homes, or modern updates to traditional bungalows.

Palette 4: Warm Clay & Ochre

Inspired by the Prairie School and Southwestern Craftsman interpretations, warm clay and golden ochre tones create a welcoming, sun-drenched appearance.

  • Body: Terracotta, Dusty Clay, or Warm Ochre
  • Trim: Deep Bronze or Espresso Brown
  • Accent & Door: Rich Cream or Forest Green
  • Best For: Sunny climates, desert landscapes, and historic bungalow restorations.

Palette 5: Classic Cream & Dark Trim (The Inverted Look)

While most Craftsman homes feature dark body colors with lighter trim, flipping the dynamic creates a light, expansive feel without sacrificing architectural gravity.

  • Body: Warm Buff, Soft Tan, or Cream
  • Trim: Deep Forest Green, Dark Chocolate Brown, or Charcoal
  • Accent & Door: Rich Stained Mahogany or Redwood
  • Best For: Smaller bungalows or homes shaded by heavy tree cover, making the structure feel larger and brighter.

3. Highlight Structural Details with Contrast

The magic of a Craftsman home lies in its joinery and woodcraft. Using color strategically ensures these expensive details don’t blend into the background.

Architectural ElementRecommended Color PlacementVisual Purpose
Gables & Knee BracesDark Accent ColorDraws the eye upward to timber joinery & roof structure
Window Casings & TrimSecondary Trim ColorDefines home silhouette & outlines window openings
Window SashesDark Accent ColorCreates visual depth within window recesses
Main Siding / ShinglesDominant Body ColorGrounds the house and anchors it to surroundings
Front DoorVibrant Accent or Stained WoodCreates a clear, welcoming focal point
  1. Tapered Columns & Pillars: Paint the main shaft of porch columns in your trim color to visually anchor the heavy porch roof to stone or brick piers below.
  2. Gables & Knee Braces: Consider using your accent color—or a shade one step darker than your body color—on decorative gables, timber trusses, and knee braces to create shadow depth.
  3. Window Sashes vs. Trim: A traditional Craftsman technique is painting window frames/trim light cream while painting the inner moveable window sashes a dark accent (such as dark brown, dark green, or black). This gives windows visual depth and historical accuracy.
  4. Stained Wood Surfaces: Never paint over high-quality cedar shakes, solid wood front doors, or tongue-and-groove porch ceilings if they are in good condition. A clear protective stain highlights grain patterns that paint conceals.

4. Tips for Selecting Paint Brands & Testing Samples

  • Look to Historical Collections: Major manufacturers offer curated historic palettes. Search for lines such as Sherwin-Williams’ Preservation Historic Collection or Benjamin Moore’s Historical Color Collection.
  • Account for Natural Light: Exterior colors always appear 1 to 2 shades lighter outdoors under direct sunlight than on a small swatch indoors. Select a shade with enough depth so it doesn’t look washed out at noon.
  • Test Large Swatches: Paint a minimum 2 ft. x 2 ft. section directly onto the siding next to your trim and stonework. Observe the test area at different times of day—morning sun, afternoon shade, and dusk—to see how undertones shift.

Conclusion

Choosing traditional Craftsman house exterior colors is all about honoring the relationship between architecture, materials, and nature. By using the Rule of Three, coordinating paint with natural stone and wood, and painting structural accents to highlight craftsmanship, you can create a timeless facade that stands out in any neighborhood.

Give us a call 541-497-3804